Shielding

Being a gadget builder, I reuse and repurpose a lot of things. Almost any bit of scrap technology can be reborn into something new and interesting with a little imagination, some know-how and hard work. I pride myself on being able to save something from a land-fill and give it new life in a new form. Because I have gotten such a reputation for doing things like that, people bring me stuff.

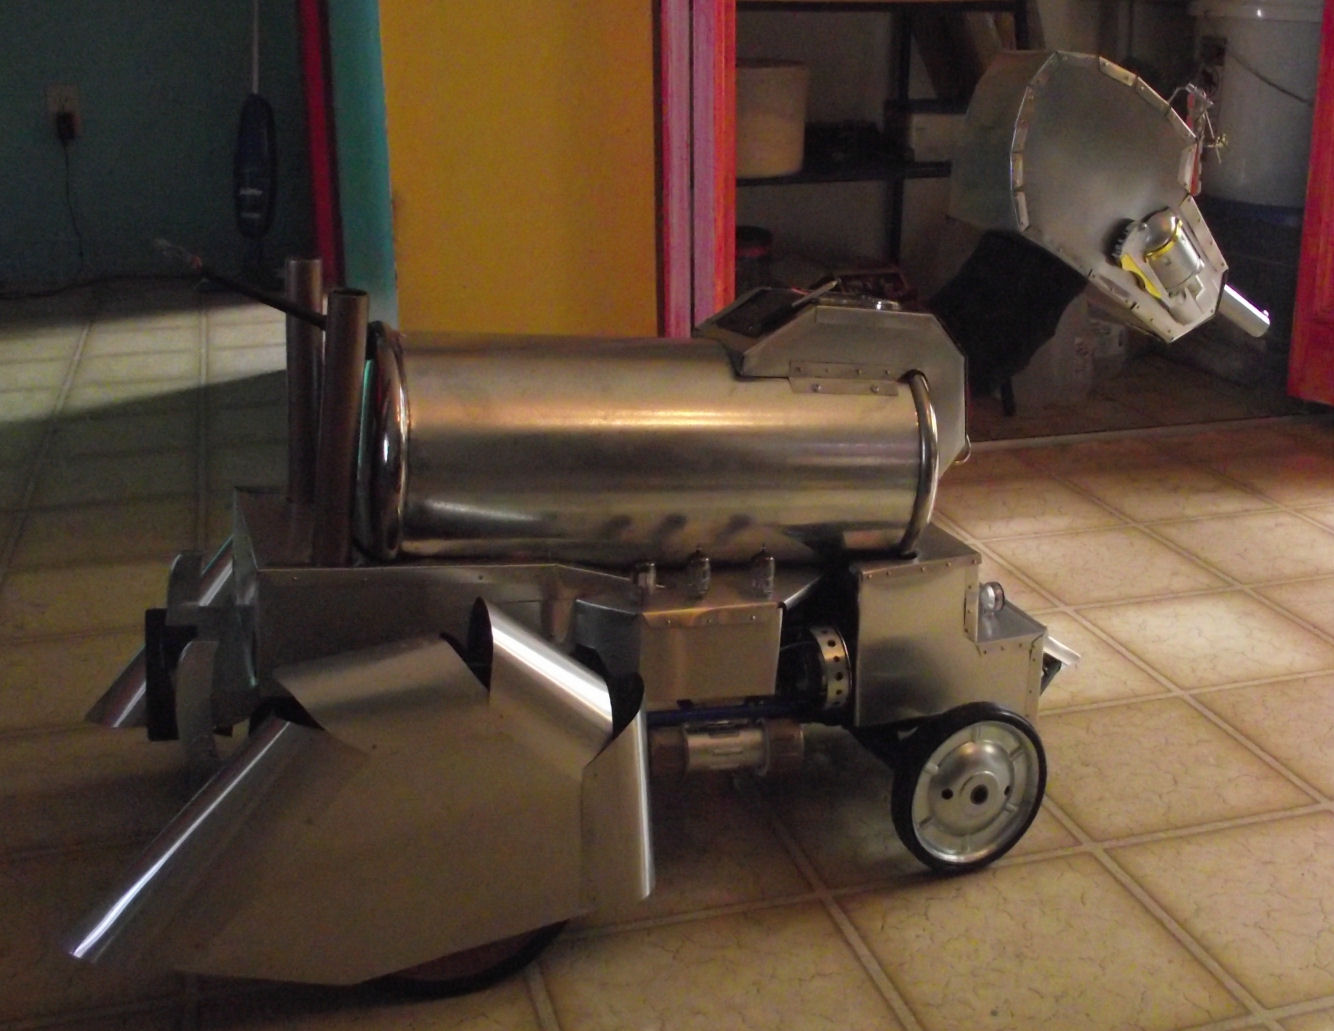
My team mate, Superhero brought me the old sun roof off of the Supermobile. The transparent roof turned the cockpit into an oven in the Florida sunshine so he removed the Lexan roof and installed a fiberglass one. The Lexan roof came to me. I was going to sell it on Ebay Motors for some Team Justice operating capital, but there are dozens of them on there. For $50 price range!
Poly-Top
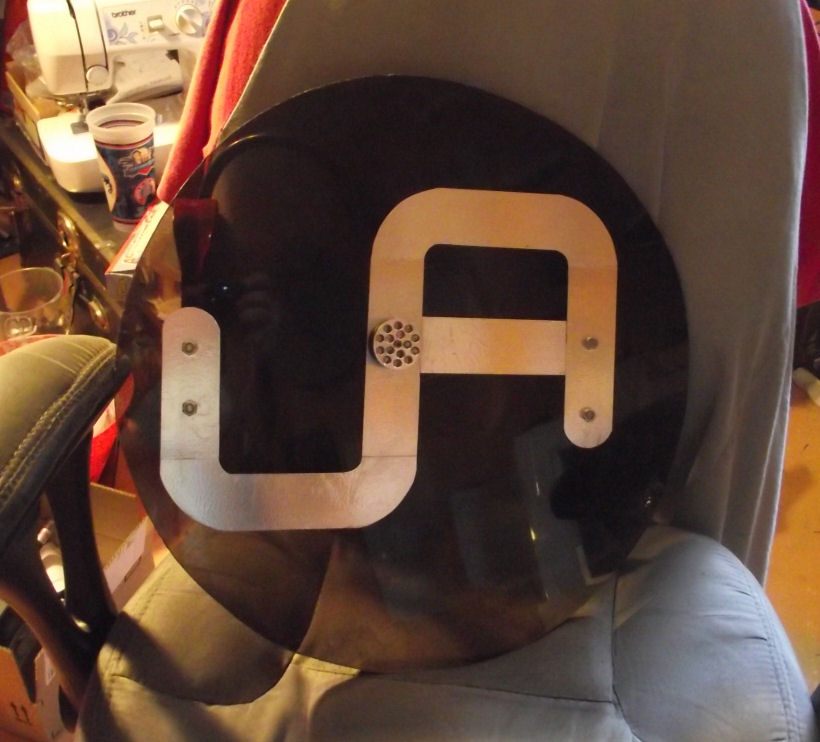
So I was stuck with this large sheet of smoked ¼ Lexan. I offered it up as shield material. The first taker was Anonyman.

I started by marking out a circle on the plastic that was roughly the diameter of the length of my forearm. Any larger and it would not be practical. Regardless of what Captain America may think, a large shield is not useful.

01

I got a leather belt from Goodwill for a few bucks and a dowel rod from my scrap box. The belt made the elbow strap and the dowel became the hand strap. Some metallic vent tape was used to create an Anonyman logo for the front of the disk. It was a pretty easy build.
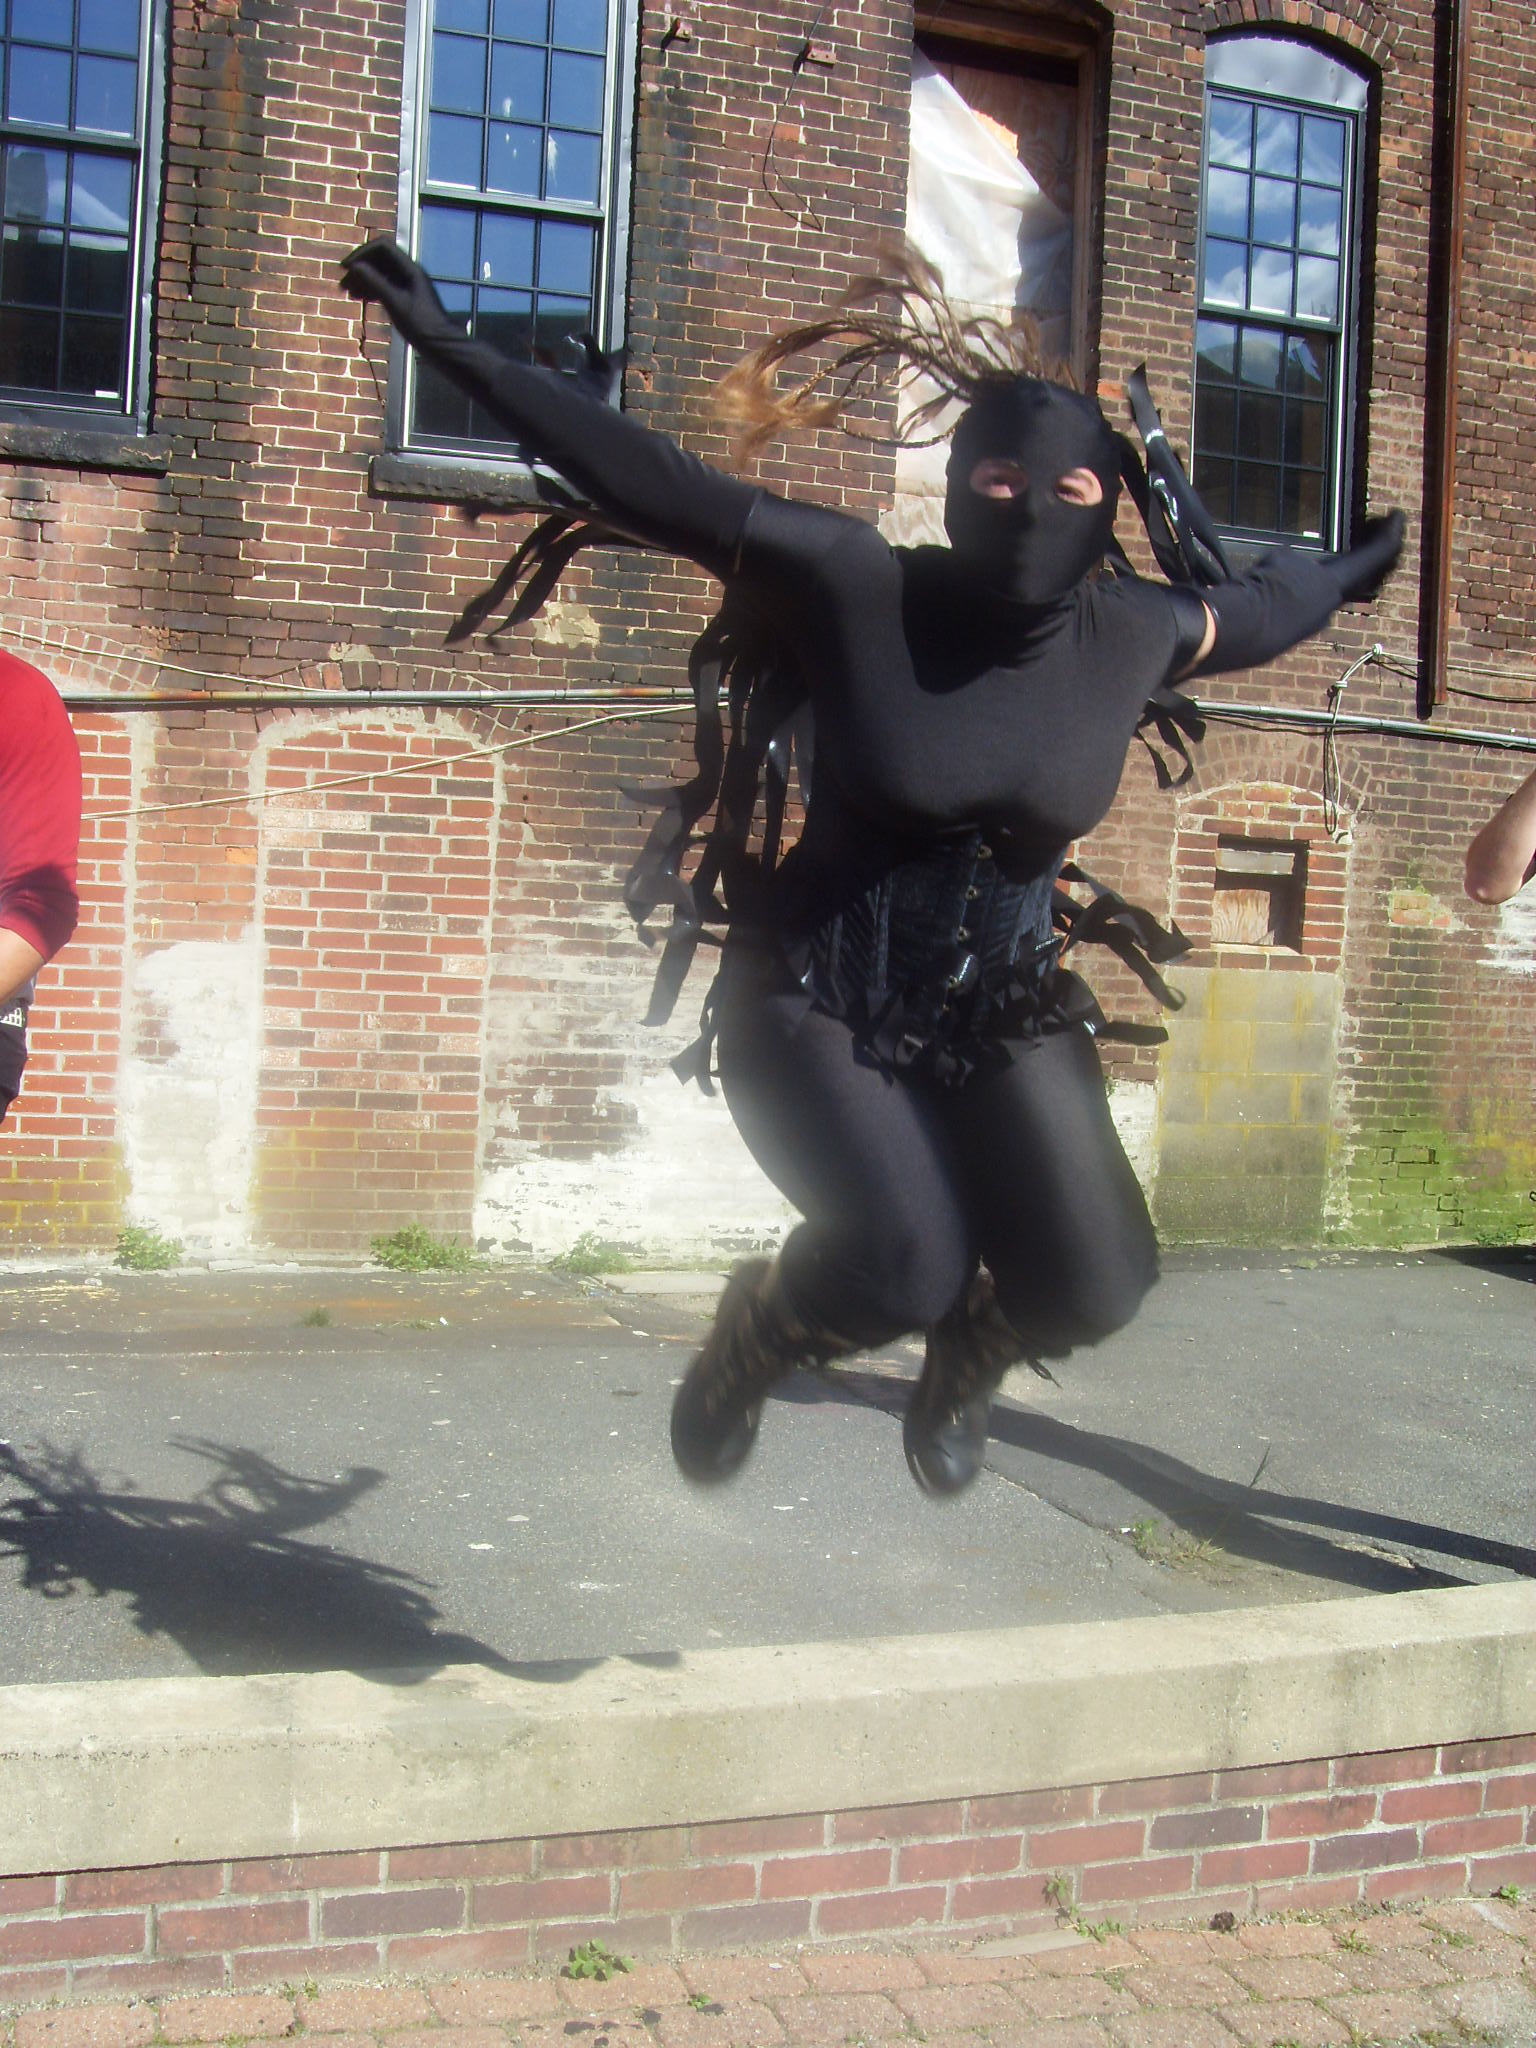
After seeing the success of the first shield, one was requested by Urban Avenger. Not wanting to duplicate past work, (I hate doing something twice) I procrastinated. I’m bad for that.

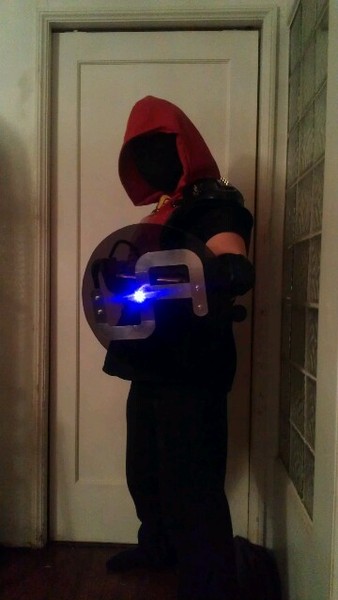
Eventually I did get around to starting on the build for Urban Avenger. I wanted to do something different for his shield so as not to be duplicating work. Urban has always had a thing for lighting and mask goggles. I wanted to create that effect on the shield using 3 lenses with the top one being an actual light with interchangeable color disks with his logo and such on the various disks.

As I was talking to him about the shield though, He told me he doesn’t really use his mask lighting any more. There goes my design plans. I decided to just put the light on it (since I already bought it) without the lenses. The light I purchased for the project is a 3 way system having a standard light, A UV setting for finding spilled fluids, (actual detective gear!) and the 3rd setting? A friggin’ Laser! Sweet.

After working out the details on how to do the Logo, I again used a Goodwill leather belt as the elbow strap. However UA, had stated he wanted it to be adjustable. It needed a buckle. More specifically it need a buckle that could be adjusted using only 1 hand.

010

Using my Dremel tool, I cut a tab shape in a square of heavy sheet metal. By folding the outer form at 1 location and the inner tab at a different location, I was able to create a double loop buckle with no moving parts. A bolt ran through the metal becomes the belt keeper. As far as I can find this is an original invention.
011
The front handle had to be a stable one on this build. It had to hold the barrel of the light on it. I couldn’t do it the same as the Anonyman shield. A section of “V” channel would do the trick. I beat the cold steel into shape with a heavy framing hammer. But it had powder coat on it. A soak in an acetone bath softened the powder coating enough to allow me to scrape it off with a utility knife. Some primer and Urban Avenger red and it was ready to go.

012

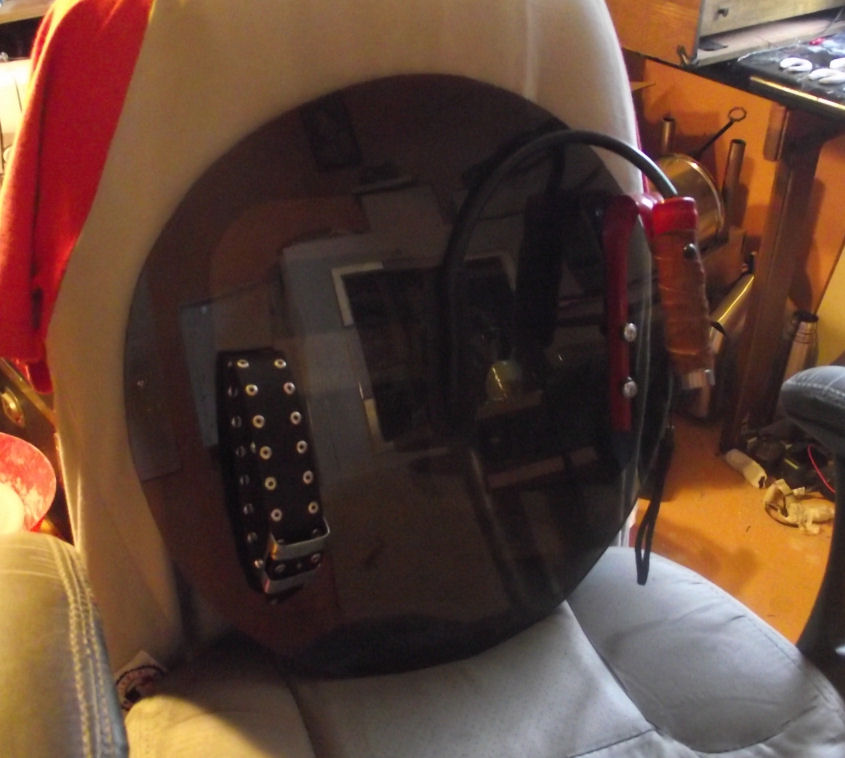
I installed it on the shield and attached light barrel to the outer edge using aircraft cable and then wrapping it with some scrap leather. I sealed the open end with a pvc pipe cap after drilling a hole in it for the wiring. I ran the wires to the emitter disk that I attached to the front of the shield using some angle braces. I then covered the wiring with some surgical tubing to keep it neat and help seal from water. I covered the connections with some leather and called it complete.
And if you are interested in seeing it in action:
httpv://youtu.be/aHAFyfeFozU
With-the-shield

So I have been building this robot

Here he is at his first official event with Team Justice and the Humane Society Of Pinellas. Strutting his stuff with the other dogs at the 12th Annual Mutt Strut.

Here is a longer (but still fun) video of K-9. Includes some explanations about him and cool Dr. Who music.
httpv://youtu.be/ExBTGOsjVso
Off and on for the past year I have been slowly putting together a model robot. It’s now at a stage where I don’t mind showing it off. You see there is a con coming up soon, and he is going with me.

He is based on K-9 from the old Doctor Who series. K-9 was a robotic-computerized tin dog on the show way back in the 70’s. That’s when I was a kid and began my long journey down the road of everything science. K-9 was, for the most part, a computer. His intellect and memory were on par or superior to The Doctor. Mans best friend as a small silver motorized computer.

DSCF1774-1024x903

He had several abilities outside of his intellect. He had a laser in his nose, sensor arrays for his ears, an interface connector that extended from his eyes, and tank treads for mobilization.

I have always been a fan of K-9. Two years ago I built a small replica one for Supercon in Miami. This small one was merely a mat-board shell over a small remote control car. It was a nice miniature version. But being made of mat-board, after some time it began to show a lot of wear and tear. It was time for a new full size one.

I found a chassis that I could use in the form of a monster truck at a garage sale. It had been left in the garage for some time and the battery boxes had corroded so it was nonfunctional. I got it for $5.00. Another $4.00 for new battery boxes from Radio Shack and a little time and solder and it was good as new.

And there is sat in my garage for at least 9 months. Why? Because I had already built one K-9 and did not enjoy the prospect of having to do it again. I’m not big on repetitive tasks. Then I discovered Steampunk. Steampunk allows us to re-imagine things that once were as new and different things. So I asked, “What if Doctor Who was Steampunk? What would K-9 look like then?” I began to work.
DSCF1744
The first thing I did was remove the monster truck tires and replace them with some that looked more retro. The front ones were from a set of training wheels from a small kid’s bike. The rear wheels came from a lawn mower and I painted them in copper and gold for that retro feel. My fender design covered most of that however.

I then removed part of the front suspension to allow a step down in the body. I used foam-core board to build the front section inspired by a trolley train. I wrapped the foam-core body section in galvanized flashing sheet metal. I then built a cow catcher for the front out of dowels and spare parts. Flashing $14.00

The sheet metal was held to the foam-core sub-structure using brass nails pushed through and bent over on the inside. The nails were then glued down and allowed to dry. This created a nice effect of having it fastened together with brass rivets. It looks real cool up close. $4.00

A plumbing coupler was added on the sides to simulate a power take-off. A trick I learned from Aviator of Skiffytown. $8.00

I built a tank from a stove pipe and a 2 kettle lids from Goodwill. Less than $10.00
The rear body structure had to support the tank and hold the whole thing together. I built it from foam core as well but included a lot of internal structure for stability and strength. I then repeated the process of creating a metal skin made of flashing. I attached my tank to that structure. I later added 2 smoke stacks on the back behind the tank. Also made a spot where some vacuum tubes could be installed to help create the proper look. A Tesla coil style tail at the back of the tank creates a nice detail as well.
DSCF1805
The voice module on the back is meant to approximate the control panel of the original K-9. It is a working USB /clock/radio/mp3 player. The 8 gig on board sd card has a set of prerecorded voice responses that I can activate with the remote. It came in a wooden box, which I disassembled and rebuilt into the structure you see, made from foam-core and sheet metal again. Amazon. $14.00
DSCF1803
The neck is a foam-core inner shape around a large section of all-thread. It was then wrapped in nylon and spray painted black. Incidentally that is the same way I built the smaller versions neck. That’s the only process that I repeated.

The head is built to closely resemble the original K-9. This was mapped out using Autocad software and each section printed onto paper at full size. The paper was then cut and used as a template to shape the foam-core precisely. After building the foam-core head I placed the barrel of a replica civil war era Ball and Powder revolver in the nose section. This replaces his laser. After skinning the head with metal I placed the sides of the gun, showing the mechanism, on the forward part of the nose. The air soft gun I used came from Amazon as well. $12.00

The eyes were made from some scrap plexiglass. The 2 antenna ears were speaker covers from the voice module. And a Steampunk monocle magnifier for $4.00 to top it all off.
DSCF1796
DSCF1797
Building a custom one-off RC robot: $71.00
Having the most awesome K-9 on the planet: Priceless
 

Safe, Proper and Fun

Greetings!
I’m finally getting a few moments to write.  Ever since the weekend of Superheroes Anonymous 5, there has been a virtual whirlwind of activity surrounding me, keeping me from writing my blog. A good deal of it is tech related so I will relay a few details to you about it.
First I want to talk to you about technology abuse. This is directly related to this blog. It seems there is some new spider software that seeks out blog comment areas and automatically dumps comments containing links to other sites that sell bull sh!t that people are trying to scam a buck from. I have gotten at least 75 of these comments in the last 3 months!
Do you see any spam links in my comments? No. That’s because I moderate all my comments. If you send me a BS comment it will go straight into the trash. So don’t bother. Because it aint happenin’!
That is an example of improper use of technology.
 
Now that is out of the way, I’ll let you know what I been up to.
 
Project EON:
Project EON was pushed to the back burner for some time due to a shift in my work schedule and the accompanying free time restrictions. Now that the holidays are behind us, I should start to have a bit more free time to work on the Mach 2 skeleton.
The Skeleton needs a strong foundation at the ankles. This is the crucial point for maintaining balance and stable safe operation of the Mach 2 and Mach 3 systems.
This is an example of the safe use of technology
 
The Website:
I oversaw the design and layout of the new Team Justice website. www.teamjusticecharity.org. It features a donation area and swag store. The donation area has been a constant and growing source of funds for various immediate needs issues for helping families and children with pressing financial problems. The swag store features gadgets, fan gear, tee-shirts and other items.
The site was programmed and maintained by Kapes. She set it up though her company AVS Productions that has been making fine internet websites for over a decade. She also has Team Justice officially partnered with the Humane Society of Pinellas! As a result Team Justice is being asked to appear at an upcoming Humane Society event.
This is an example of the proper use of technology.
 
The Robot:
I have been frantically building a robot superstructure over a modified, re-purposed radio control monster truck that I got at a rummage sale. I love rummage sales.  Anyway, it is to be debuted at Megacon in Orlando in the middle of February. This is 6 weeks earlier than I thought it was going to be. So I have been hustling to complete it.
When Miss. Fit was in town I showed it off a bit in its unfinished state. It’s not really a Hero gadget, though it could be adapted as a search drone. Mostly it’s just something I am building for fun.
An example of a fun use of technology.